一、从官方系统刷机变成armbian系统
照着 联想粒子矿云/我家云 线刷OMV(Open Media Vault),图文教程 的帖子刷机就好了,这里使用的固件是: 我家云、粒子云可前面板按键关机armbain内核5.4.2纯净版
所有刷机材料及固件文件备份在下面的网盘链接中。
{cloud title=刷机材料(教程、驱动、固件) type=default url=https://drive.kanochan.net/s/rJSL?path=%2F password=\/}
二、更新系统时间
刷机好后开机,遇到的 第一件事 第二件事就是更新系统时间。(第一件事是修改root用户密码)。因为系统时间错误,而且ntp软件未安装,在时间错误的情况下安装软件可能会导致错误,所以需要手动修改系统时间。方法如下:
1、更改系统时区
执行命令
tzselect在出现的结果中,用数字选择大洲、国家、地区
root@Chainedbox:~# tzselect
Please identify a location so that time zone rules can be set correctly.
Please select a continent, ocean, "coord", or "TZ".
1) Africa                                                            7) Europe
2) Americas                                                          8) Indian Ocean
3) Antarctica                                                        9) Pacific Ocean
4) Asia                                                             10) coord - I want to use geographical coordinates.
5) Atlantic Ocean                                                   11) TZ - I want to specify the timezone using the Posix TZ format.
6) Australia
#?
root@Chainedbox:~# tzselect
Please identify a location so that time zone rules can be set correctly.
Please select a continent, ocean, "coord", or "TZ".
1) Africa                                                            7) Europe
2) Americas                                                          8) Indian Ocean
3) Antarctica                                                        9) Pacific Ocean
4) Asia                                                             10) coord - I want to use geographical coordinates.
5) Atlantic Ocean                                                   11) TZ - I want to specify the timezone using the Posix TZ format.
6) Australia
#? 4
Please select a country whose clocks agree with yours.
1) Afghanistan            10) Cyprus                19) Japan                 28) Macau                 37) Qatar                 46) Turkmenistan
2) Armenia                11) East Timor            20) Jordan                29) Malaysia              38) Russia                47) United Arab Emirates
3) Azerbaijan             12) Georgia               21) Kazakhstan            30) Mongolia              39) Saudi Arabia          48) Uzbekistan
4) Bahrain                13) Hong Kong             22) Korea (North)         31) Myanmar (Burma)       40) Singapore             49) Vietnam
5) Bangladesh             14) India                 23) Korea (South)         32) Nepal                 41) Sri Lanka             50) Yemen
6) Bhutan                 15) Indonesia             24) Kuwait                33) Oman                  42) Syria
7) Brunei                 16) Iran                  25) Kyrgyzstan            34) Pakistan              43) Taiwan
8) Cambodia               17) Iraq                  26) Laos                  35) Palestine             44) Tajikistan
9) China                  18) Israel                27) Lebanon               36) Philippines           45) Thailand
#? 9
Please select one of the following timezones.
1) Beijing Time
2) Xinjiang Time
#? 1

The following information has been given:

        China
        Beijing Time

Therefore TZ='Asia/Shanghai' will be used.
Selected time is now:   Sun Oct 24 11:11:56 CST 2021.
Universal Time is now:  Sun Oct 24 03:11:56 UTC 2021.
Is the above information OK?
1) Yes
2) No
#? 1

You can make this change permanent for yourself by appending the line
        TZ='Asia/Shanghai'; export TZ
to the file '.profile' in your home directory; then log out and log in again.

Here is that TZ value again, this time on standard output so that you
can use the /usr/bin/tzselect command in shell scripts:
Asia/Shanghai
root@Chainedbox:~#
将修改结果存入本地文件中
cp /usr/share/zoneinfo/Asia/Shanghai /etc/localtime2、手动更改系统时间
date -s MM/DD/YY //修改日期
date -s hh:mm:ss //修改时间
3、修改时间以后,修改硬件CMOS的时间
hwclock --systohc三、更新系统软件包
第一次更新可能比较久,因为官方源在国外,建议全程科学网络更新。为了安装最新版的软件,需要添加官方的测试版软件源(主要针对qbittorrent软件)
编辑文件,
nano /etc/apt/sources.list将测试版qbittorrent源添加到软件源里。
将下面的软件源粘贴到文件最后一行里,保存后执行 apt update
deb http://ftp.cn.debian.org/debian bullseye main四、格式化硬盘
需要将硬盘的文件格式改成ext4格式,Windows的ntfs格式在我家云的armbian上跑不满千兆网络。注意备份好重要的文件。
装了一块4T的硬盘,因为fdisk只支持2T以内的硬盘分区,所以需要安装parted用于2T以上硬盘分区。
1、安装parted
执行命令
`apt install parted安装即可。
root@Chainedbox:~# apt install parted
Reading package lists... Done
Building dependency tree
Reading state information... Done
The following additional packages will be installed:
  libparted2 libreadline8
Suggested packages:
  libparted-dev libparted-i18n parted-doc
The following NEW packages will be installed:
  libreadline8
The following packages will be upgraded:
  libparted2 parted
2 upgraded, 1 newly installed, 0 to remove and 400 not upgraded.
Need to get 701 kB of archives.
After this operation, 612 kB of additional disk space will be used.
Do you want to continue? [Y/n] y
Get:1 http://ftp.cn.debian.org/debian bullseye/main arm64 libreadline8 arm64 8.1-1 [160 kB]
Get:2 http://ftp.cn.debian.org/debian bullseye/main arm64 parted arm64 3.4-1 [216 kB]
Get:3 http://ftp.cn.debian.org/debian bullseye/main arm64 libparted2 arm64 3.4-1 [324 kB]
Fetched 701 kB in 1s (881 kB/s)
Selecting previously unselected package libreadline8:arm64.
(Reading database ... 32455 files and directories currently installed.)
Preparing to unpack .../libreadline8_8.1-1_arm64.deb ...
Unpacking libreadline8:arm64 (8.1-1) ...
Preparing to unpack .../parted_3.4-1_arm64.deb ...
Unpacking parted (3.4-1) over (3.2-25) ...
Preparing to unpack .../libparted2_3.4-1_arm64.deb ...
Unpacking libparted2:arm64 (3.4-1) over (3.2-25) ...
Setting up libreadline8:arm64 (8.1-1) ...
Setting up libparted2:arm64 (3.4-1) ...
Setting up parted (3.4-1) ...
Processing triggers for libc-bin (2.28-10) ...
Processing triggers for man-db (2.8.5-2) ...
root@Chainedbox:~#
2、删除所有分区
执行命令
parted /dev/sda rm 1删除sda1分区。发生了错误。
root@Chainedbox:~# parted /dev/sda rm 1
Error: /dev/sda: unrecognised disk label
发生了错误,原因是未修改磁盘的格式,parted无法识别是GPT磁盘还是MBR磁盘。
2.1、修改磁盘格式
执行命令:
parted /dev/sdaroot@Chainedbox:~# parted /dev/sda
GNU Parted 3.4
Using /dev/sda
Welcome to GNU Parted! Type 'help' to view a list of commands.
(parted) mklabel //输入mklabel
New disk label type? gpt //输入gpt
(parted)修改磁盘格式后,所有分区会丢失。
3、新建ext4分区
root@Chainedbox:~# parted /dev/sda  //输入parted /dev/sda对sda磁盘操作
GNU Parted 3.4
Using /dev/sda
Welcome to GNU Parted! Type 'help' to view a list of commands.
(parted) mkpart  //输入mkpart
Partition name?  []? sda1  //分区名称
File system type?  [ext2]? ext4  //分区文件系统
Start? 0  //分区起始位置
End? 100%  //分区结束位置,100%表示使用所有空间
Warning: The resulting partition is not properly aligned for best performance: 6s % 256s != 0s  //关于类似4K对齐的错误,忽略即可
Ignore/Cancel? Ignore/  //忽略或取消
(parted) p  //输入p查看分区状态
Model: HGST HUS 724040ALA640 (scsi)
Disk /dev/sda: 4001GB
Sector size (logical/physical): 4096B/4096B
Partition Table: gpt
Disk Flags:

Number  Start   End     Size    File system  Name  Flags
 1      24.6kB  4001GB  4001GB  ext4         sda1  //可看到分区已经被创建

(parted) quit  //退出parted,分区会自动保存
Information: You may need to update /etc/fstab.
root@Chainedbox:~#
需要再一次执行
mkfs -t ext4 /dev/sda1格式化分区,不然挂载的时候会出错,不清楚原因。报错内容:mount: /mnt/sda1: wrong fs type, bad option, bad superblock on /dev/sda1, missing codepage or helper program, or other error.
五、挂载磁盘到系统
1、手动挂载
新建挂载位置: mkdir /mnt/sda1
挂载sda1分区到/mnt/sda1: mount /dev/sda1 /mnt/sda1
2、开机自动挂载
执行命令查看硬盘UUID
blkid /dev/sda1修改 /etc/fstab 文件
nano /etc/fstab添加以下内容(UUID不要照抄,用上面获得到的UUID)
UUID="e3fc34dd-a5b9-419e-ae81-4fb4eb883df9" /mnt/sda1 ext4 defaults 0 0保存文件即可。
{alert type=warning}
警告:不推荐使用上面的办法,亲测如果硬盘挂掉,会无法进入系统,只能采用故障救援的模式进入系统。但是我家云没有显示输出,如果硬盘挂掉,只能重新刷机!!!
{/alert}
3、另一种开机自动挂载硬盘的方法
采用脚本任务挂载硬盘,开机自动执行脚本即可挂载,相当于手动挂载。
创建脚本文件
nano /etc/init.d/mount.sh写入以下内容
#! /bin/sh
sleep 1
mount /dev/sda1 /mnt/sda1
保存后赋予脚本权限
chmod +x /etc/init.d/mount.sh配置开机自动执行脚本挂载硬盘
nano /etc/rc.local在文本的 exit0 之前添加以下内容
sh /etc/init.d/mount.sh完成。
六、安装qbittorrent-nox
1、安装
执行命令: apt install qbittorrent-nox ,安装时间视你的网络状况而定,建议全程科学网络操作。

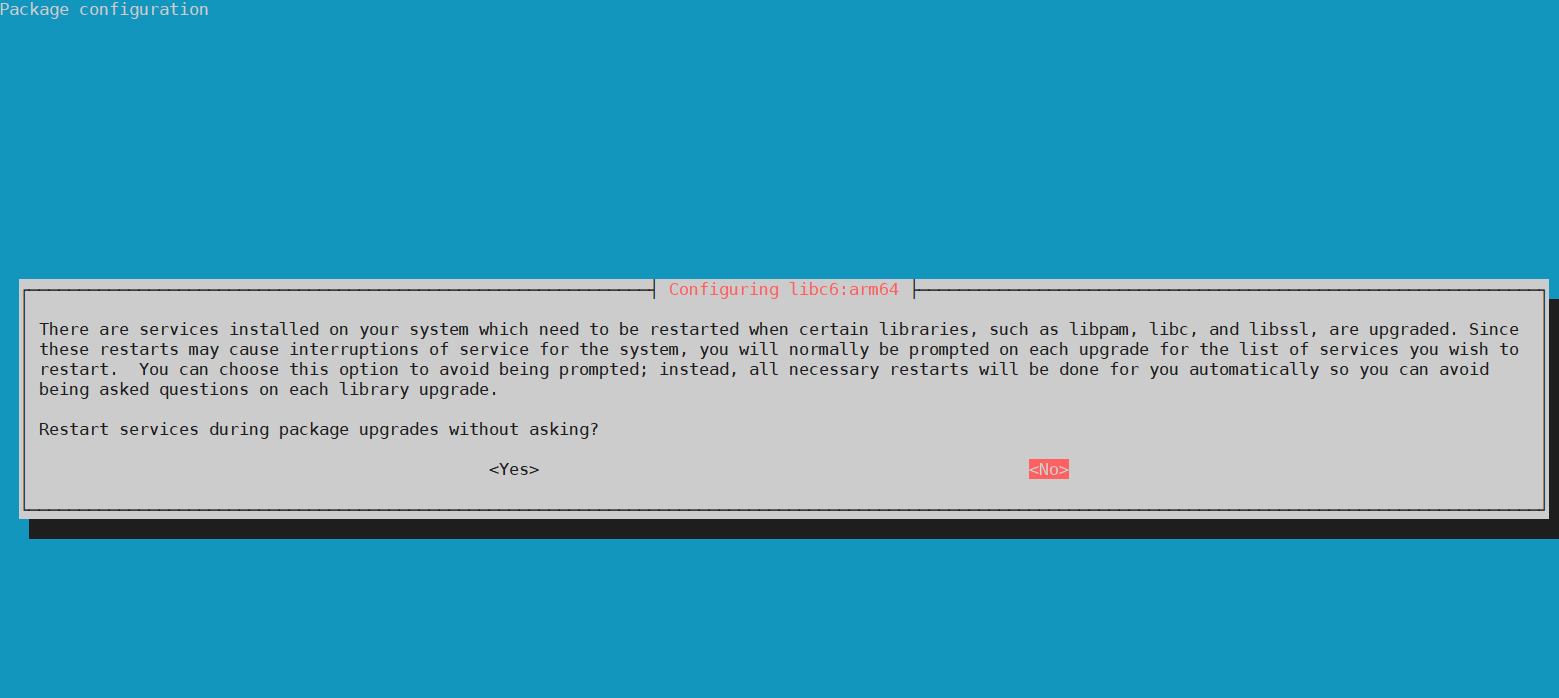
安装过程中会跳出选择界面,大意是安装过程中会重启某些系统服务,可能会影响别的程序运行,问你是否自动重启这些服务。选择否的话,qbittorrent安装完成后,你需要重启一些服务(安装完成后会给出来)才能运行qbittorrent。一般来说,没有什么特殊情况,就选“是”吧。

这里选择使用现有配置(选第二项),以免出现不可预料的问题。

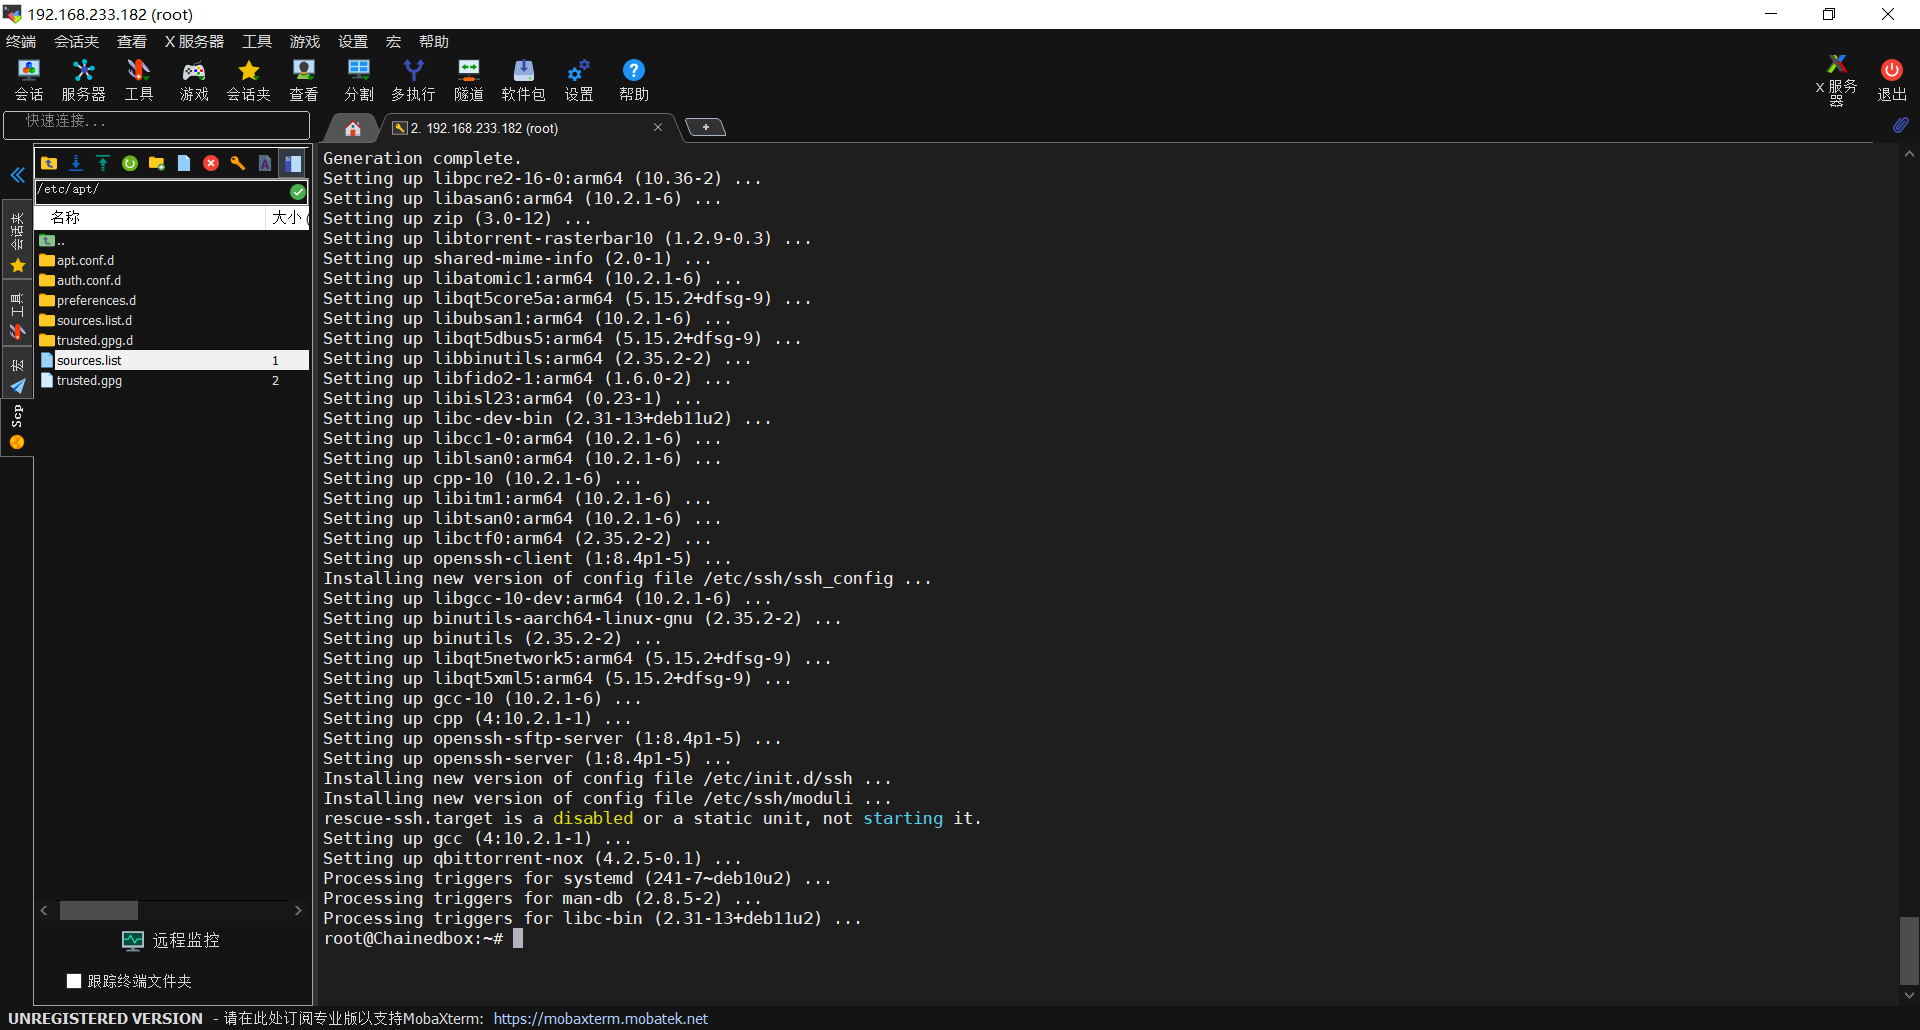
安装完成。
2、 配置qbittorrent开机自启
新建一个文件
nano /etc/systemd/system/qbittorrent.service写入下面的内容后,保存。
[Unit]
Description=qbittorrent torrent server

[Service]
User=root
ExecStart=/usr/bin/qbittorrent-nox
Restart=on-abort

[Install]
WantedBy=multi-user.target
2.1、重启系统单元
systemctl daemon-reload2.2、设置开机自启
systemctl enable qbittorrent2.3、启动qbittorrent
systemctl start qbittorrent2.4、关闭qbittorrent
systemctl stop qbittorrent2.5、重启qbittorrent
systemctl restart qbittorrent配置下载位置什么的略过了,按照页面提示配置即可。
七、安装samba,启用网络共享
测试发现,官方源的samba安装会发生错误,更换为国内源之后可以解决。编辑清空 /etc/apt/sources.list 里的内容,更换为国内源如下:
deb https://mirrors.ustc.edu.cn/debian/ buster main contrib non-free
deb-src https://mirrors.ustc.edu.cn/debian/ buster main contrib non-free
deb https://mirrors.ustc.edu.cn/debian/ buster-updates main contrib non-free
deb-src https://mirrors.ustc.edu.cn/debian/ buster-updates main contrib non-free
deb https://mirrors.ustc.edu.cn/debian-security/ buster/updates main contrib non-free
deb-src https://mirrors.ustc.edu.cn/debian-security/ buster/updates main contrib non-free
deb https://mirrors.tuna.tsinghua.edu.cn/debian/ buster main contrib non-free
# deb-src https://mirrors.tuna.tsinghua.edu.cn/debian/ buster main contrib non-free
deb https://mirrors.tuna.tsinghua.edu.cn/debian/ buster-updates main contrib non-free
# deb-src https://mirrors.tuna.tsinghua.edu.cn/debian/ buster-updates main contrib non-free
deb https://mirrors.tuna.tsinghua.edu.cn/debian-security buster/updates main contrib non-free
# deb-src https://mirrors.tuna.tsinghua.edu.cn/debian-security buster/updates main contrib non-free
备份一下官方源,可能以后会用到
deb http://httpredir.debian.org/debian buster main contrib non-free
#deb-src http://httpredir.debian.org/debian buster main contrib non-free

deb http://httpredir.debian.org/debian buster-updates main contrib non-free
#deb-src http://httpredir.debian.org/debian buster-updates main contrib non-free

deb http://httpredir.debian.org/debian buster-backports main contrib non-free
#deb-src http://httpredir.debian.org/debian buster-backports main contrib non-free

deb http://security.debian.org/ buster/updates main contrib non-free
#deb-src http://security.debian.org/ buster/updates main contrib non-free
#deb http://ftp.cn.debian.org/debian bullseye main
保存文件,执行安装命令 apt install samba
安装完成后修改 /etc/samba/smb.conf ,清空里边的内容,写入下面的内容。此配置为匿名共享设置,无需登入就可以查看修改文件。可根据需要自行配置文件。
[global]
        workgroup = MYGROUP
        server string = Samba Server Version %v
        log file = /var/log/samba/log.%m
        max log size = 50
        security = user
        map to guest = Bad User
        load printers = yes
        cups options = raw
[sda1]
        comment = share
        path = /mnt/sda1
        directory mask = 0777
        create mask = 0777
        #browseable = yes
        guest ok=yes
        writable=yes
保存后执行 smbd restart 重启smaba服务以使配置生效。
八、安装Filebrowser文件管理软件
1、安装
新建文件夹 /etc/filebrowser/ ,通过GitHub下载filebrowser对应平台的二进制文件:https://github.com/filebrowser/filebrowser/releases
将下载好的文件解压,将里面的filebrowser二进制文件上传到 /etc/filebrowser/ 目录,同时在相同目录下新建文件 config.json ,打开config.json文件写入以下内容:
{
    "port": 8088,
    "address": "0.0.0.0",
    "root": "/",
    "database": "/etc/filebrowser/filebrowser.db",
    "log": "/etc/filebrowser/filebrowser.log",
    "username": "admin"
}
2、配置开机自启
新建文件 /etc/systemd/system/filebrowser.service ,写入以下内容并保存。
[Unit]
Description=The filebrowser Process Manager
After=network.target

[Service]
Type=simple
ExecStart=/etc/filebrowser/filebrowser -c /etc/filebrowser/config.json
ExecStop=/bin/killall filebrowser
PrivateTmp=true

[Install]
WantedBy=multi-user.target
执行以下命令控制filebrowser
systemctl start filebrowser //启动
systemctl start filebrowser //重启
systemctl status filebrowser  //查看状态
systemctl enable filebrowser  //开机自启
九、安装Aria2
参考来源: Ubuntu/Debian系统安装配置aria2和WebUI
1、安装
执行命令 apt install aria2 命令安装
2、创建Aria2的工作目录和相关文件
依次输入下列命令:
mkdir /etc/aria2    #新建文件夹
touch /etc/aria2/aria2.session    #新建session文件
chmod 777 /etc/aria2/aria2.session    #设置aria2.session可写
nano /etc/aria2/aria2.conf    #创建aria2配置文件
把下面的aria2配置文件模板写入“aria2.conf”,需要修改的有下载目录“dir”以及连接秘钥“rpc-secret”,其他内容可以不动,模板里面都有详细文字说明:
##===================================##
## 文件保存相关 ##
##===================================##

# 文件保存目录
dir=../download
# 启用磁盘缓存, 0为禁用缓存, 需1.16以上版本, 默认:16M
disk-cache=16M
# 断点续传
continue=true
#日志保存
log=aria2.log

# 文件预分配方式, 能有效降低磁盘碎片, 默认:prealloc
# 预分配所需时间: none < falloc ? trunc < prealloc
# falloc和trunc则需要文件系统和内核支持
# NTFS建议使用falloc, EXT3/4建议trunc, MAC 下需要注释此项
file-allocation=prealloc

##===================================##
## 下载连接相关 ##
##===================================##

# 最大同时下载任务数, 运行时可修改, 默认:5
max-concurrent-downloads=100
# 同一服务器连接数, 添加时可指定, 默认:1
# 官方的aria2最高设置为16, 如果需要设置任意数值请重新编译aria2
max-connection-per-server=16

# 整体下载速度限制, 运行时可修改, 默认:0(不限制)
max-overall-download-limit=0
# 单个任务下载速度限制, 默认:0(不限制)
max-download-limit=0
# 整体上传速度限制, 运行时可修改, 默认:0(不限制)
max-overall-upload-limit=0
# 单个任务上传速度限制, 默认:0(不限制)
max-upload-limit=0

# 禁用IPv6, 默认:false
disable-ipv6=false

# 最小文件分片大小, 添加时可指定, 取值范围1M -1024M, 默认:20M
# 假定size=10M, 文件为20MiB 则使用两个来源下载; 文件为15MiB 则使用一个来源下载
min-split-size=10M

# 单个任务最大线程数, 添加时可指定, 默认:5
# 建议同max-connection-per-server设置为相同值
split=16

##===================================##
## 进度保存相关 ##
##===================================##

# 从会话文件中读取下载任务
input-file=/etc/aria2/aria2.session
# 在Aria2退出时保存错误的、未完成的下载任务到会话文件
save-session=/etc/aria2/aria2.session
# 定时保存会话, 0为退出时才保存, 需1.16.1以上版本, 默认:0
save-session-interval=60

##===================================##
## RPC相关设置 ##
##此部分必须启用,否则无法使用WebUI
##===================================##

# 启用RPC, 默认:false
enable-rpc=true
# 允许所有来源, 默认:false
rpc-allow-origin-all=true
# 允许外部访问, 默认:false
rpc-listen-all=true
# RPC端口, 仅当默认端口被占用时修改

rpc-listen-port=6800
# 设置的RPC授权令牌, v1.18.4新增功能, 取代 --rpc-user 和 --rpc-passwd 选项
rpc-secret=123456

# 设置的RPC访问用户名, 此选项新版已废弃, 建议改用 --rpc-secret 选项
#rpc-user=
# 设置的RPC访问密码, 此选项新版已废弃, 建议改用 --rpc-secret 选项
#rpc-passwd=

# 启动SSL
# rpc-secure=true
# 证书文件, 如果启用SSL则需要配置证书文件, 例如用https连接aria2
# rpc-certificate=
# rpc-private-key=

##===================================##
## BT/PT下载相关 ##
##===================================##

# 当下载的是一个种子(以.torrent结尾)时, 自动开始BT任务, 默认:true
follow-torrent=true
# BT监听端口, 当端口被屏蔽时使用, 默认:6881-6999
listen-port=51413
# 单个种子最大连接数, 默认:55
#bt-max-peers=55
# 打开DHT功能, PT需要禁用, 默认:true
enable-dht=true
# 打开IPv6 DHT功能, PT需要禁用
enable-dht6=true
# DHT网络监听端口, 默认:6881-6999
dht-listen-port=6881-6999

# 本地节点查找, PT需要禁用, 默认:false
bt-enable-lpd=true
# 种子交换, PT需要禁用, 默认:true
enable-peer-exchange=true
# 每个种子限速, 对少种的PT很有用, 默认:50K
bt-request-peer-speed-limit=50K

# 客户端伪装, PT需要
peer-id-prefix=-TR2770-
user-agent=Transmission/2.77

# 当种子的分享率达到这个数时, 自动停止做种, 0为一直做种, 默认:1.0
seed-ratio=0
# 强制保存会话, 即使任务已经完成, 默认:false
# 较新的版本开启后会在任务完成后依然保留.aria2文件
force-save=true
# BT校验相关, 默认:true
#bt-hash-check-seed=true
# 继续之前的BT任务时, 无需再次校验, 默认:false
bt-seed-unverified=true
# 保存磁力链接元数据为种子文件(.torrent文件), 默认:false
bt-save-metadata=true
# 单个种子最大连接数, 默认:55 0表示不限制
bt-max-peers=0
# 最小做种时间, 单位:分
# seed-time = 60
# 分离做种任务
bt-detach-seed-only=true
#BT Tracker List ;下载地址:https://github.com/ngosang/trackerslist
bt-tracker=udp://tracker.coppersurfer.tk:6969/announce,udp://tracker.internetwarriors.net:1337/announce,udp://tracker.opentrackr.org:1337/announce
3、安装web管理
配置和运行过程要用到git和nodejs,没有的话先安装:
apt-get install nodejs git把webui-aria2项目克隆下来,保存到“/etc/aria2”目录:
cd /etc/aria2 && git clone https://github.com/ziahamza/webui-aria2.git4、创建启动脚本及配置开机自启
新建aria2c脚本文件:
nano /etc/init.d/aria2c写入以下内容:
#!/bin/sh
### BEGIN INIT INFO
# Provides: aria2
# Required-Start: $remote_fs $network
# Required-Stop: $remote_fs $network
# Default-Start: 2 3 4 5
# Default-Stop: 0 1 6
# Short-Description: Aria2 Downloader
### END INIT INFO

start()
{
 echo -n "启动Aria2c和WebUI"
 aria2c --conf-path=/etc/aria2/aria2.conf -D
 cd /etc/aria2/webui-aria2/
 node node-server.js
 exit 0;
}
stop()
{
 echo -n "关闭Aria2c和WebUI"
 kill -9 $(ps -ef | grep node-server.js | grep -v grep | awk '{print $2}') && killall aria2c
 exit 0;
}
case "$1" in
start)
 start
;;
stop)
 stop
;;
restart)
 stop
 start
;;
*)
echo "Usage: $0 {start|stop|restart}"
exit 0
;;
esac
exit 0
修改脚本文件权限为755
chmod 755 /etc/init.d/aria2c添加aria2c服务并设置开机启动
update-rc.d aria2c defaults启动服务:
service aria2c start10、通过面板led灯来判断网络状态
新建脚本文件led.sh
nano /bin/led.sh在文件中写入以下内容,并保存。
#! /bin/bash
sleep 3
echo 85 > /sys/class/gpio/export
echo 0 > /sys/class/gpio/export
while true
do
ping -W 1 -c 1 www.bilibili.com > /dev/null 2>&1
if [ $? -eq 0 ];
then
echo "high" > /sys/class/gpio/gpio85/direction
echo "low" > /sys/class/gpio/gpio0/direction
else
echo "high" > /sys/class/gpio/gpio0/direction
echo "low" > /sys/class/gpio/gpio85/direction
fi
sleep 3
done
赋予脚本权限
chmod +x /bin/led.sh配置脚本开机自启
nano /etc/rc.local在文本的 exit0 之前添加以下内容
sh /bin/led.sh完成。


Comments NOTHING